Redux Toolkit

For a more enjoyable experience on this blog, I suggest that you have the following prerequisites:
- A basic understanding of React hooks.
- Familiarity with mutating objects in Javascript.
- Fundamental knowledge of Typescript.
- Installation of the Redux Devtools extension on browser.
Let’s get started!
I. What is Redux Toolkit?
Redux Toolkit is a powerful package developed by the Redux team to simplify the usage of Redux, speed up development, and promote a standardized approach to writing Redux logic.
It aims to address common challenges developers face, including:
- The complexity of configuring a store.
- The need to include numerous packages such as middleware, selectors, etc.
- The excessive boilerplate code that Redux often demands.
Redux Toolkit comprises several small packages:
- Redux: The core of state management.
- ImmerJs: Simplifies working with immutable state.
- RTK Query: A powerful tool for fetching and caching data.
Before delving into Redux Toolkit, it’s beneficial if you have prior knowledge with Redux. If you’re already family with Redux and its core concept, feel free to skip this section. However, for those who need a fresher, I’ve prepared a brief overview of Redux.
1. What is Redux?
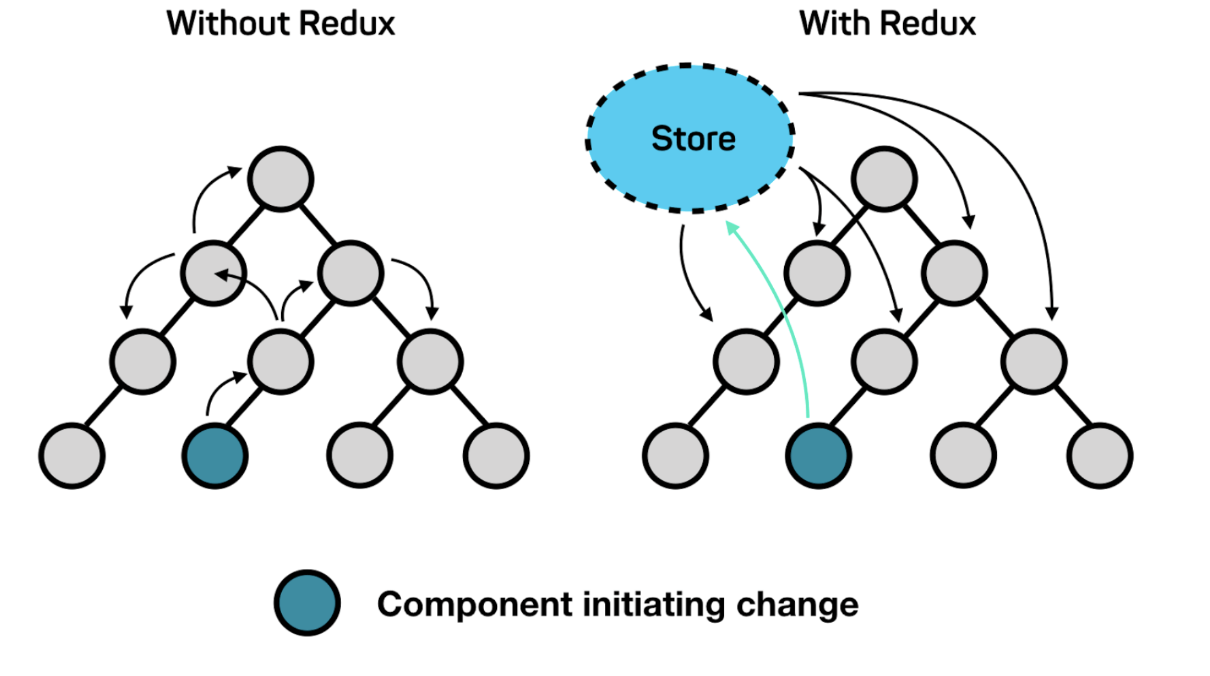
Redux is a pattern and library for managing the state of an application in a more organized and predictable way. With Redux, the entire state of an application is managed within a single immutable object. Every update to the Redux state results in a new copy of the state, plush the new changes.
In the past, without Redux, our data would be tied to individual components, necessitating the passing of data through every level of components.
2. How does Redux work?
Redux includes 4 core components:
- Store
- Actions
- Dispatch
- Reducers
Let’s explore the role of each component.
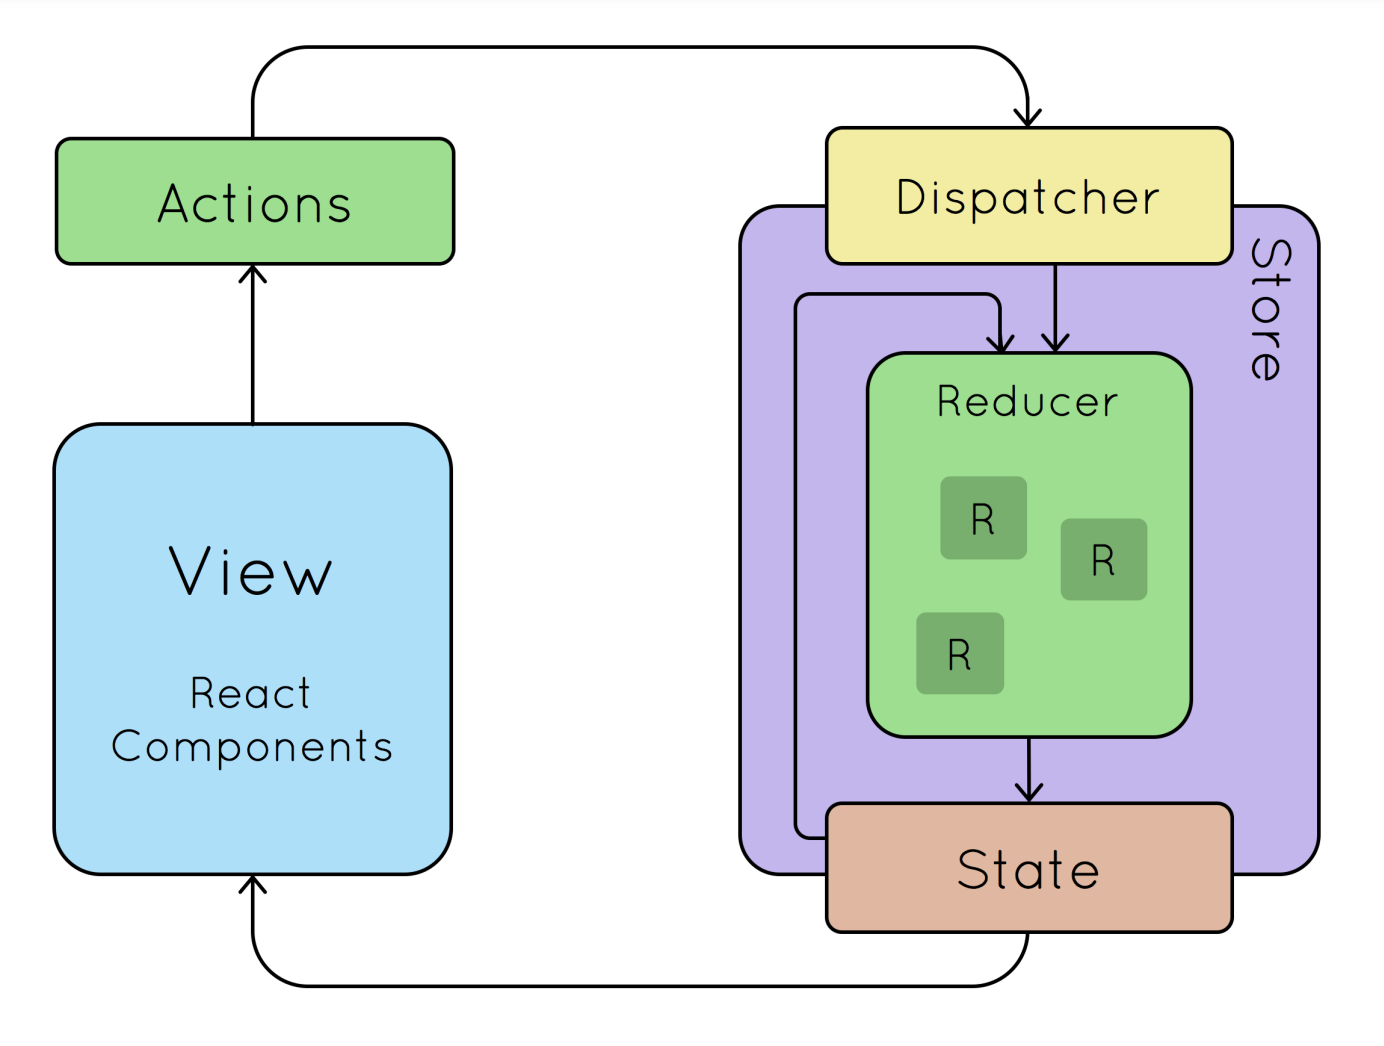 The Store: The central repository of the application's state. It contains the entire state tree, providing a comprehensive snapshot of application’s data.
Actions: Used to send data from an application to the Redux store. An action is an object with two properties: type and payload (optional). The type property describes the action and is generally an uppercase string. The payload is additional data that we want to pass along with the action.
Dispatch: Function that allows sending an action to update the state of application. When calling dispatch, the store runs an action through all of the available reducers, which in turn update the state accordingly.
Reducers: These functions that specify how the application's state changes in response to actions. Reducers take two params: state and an action, and return a new state. They are pure functions and should not modify the state directly.
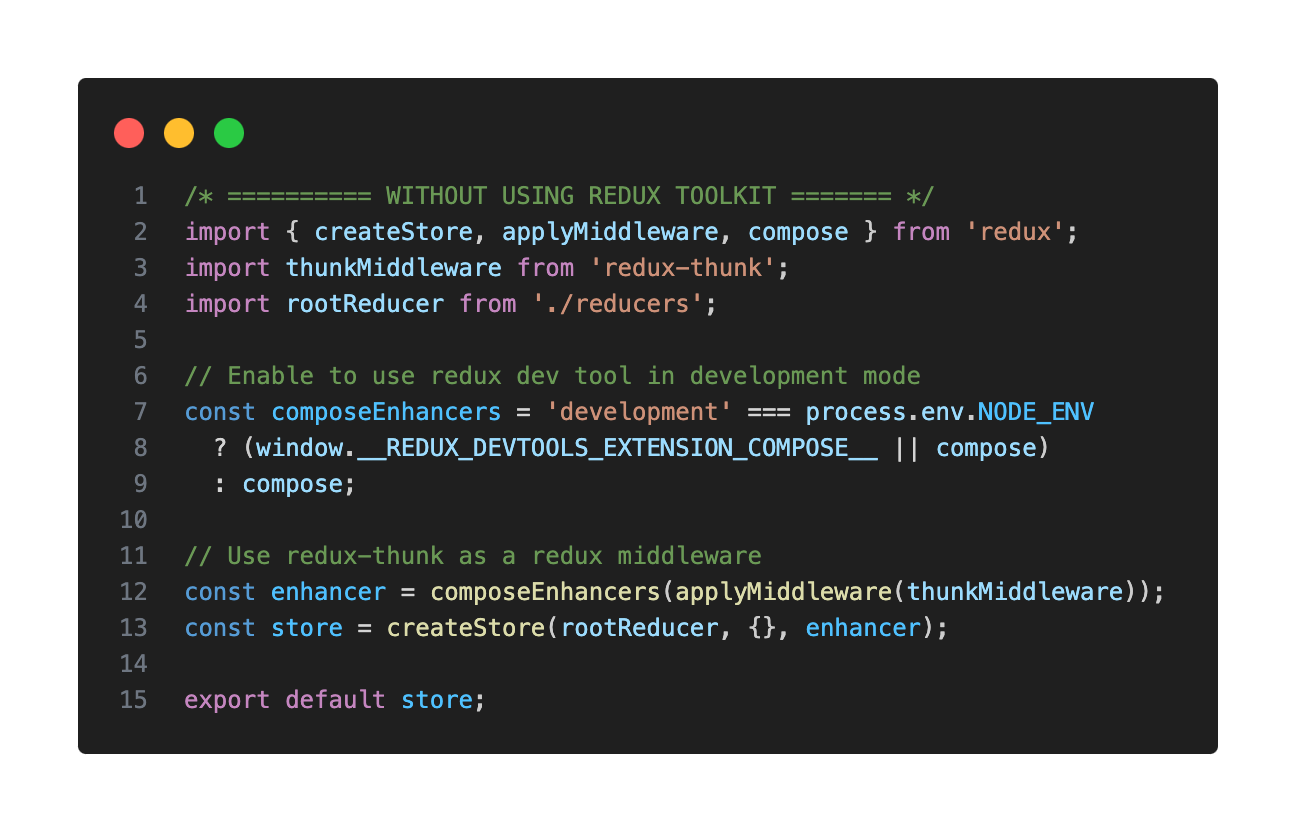
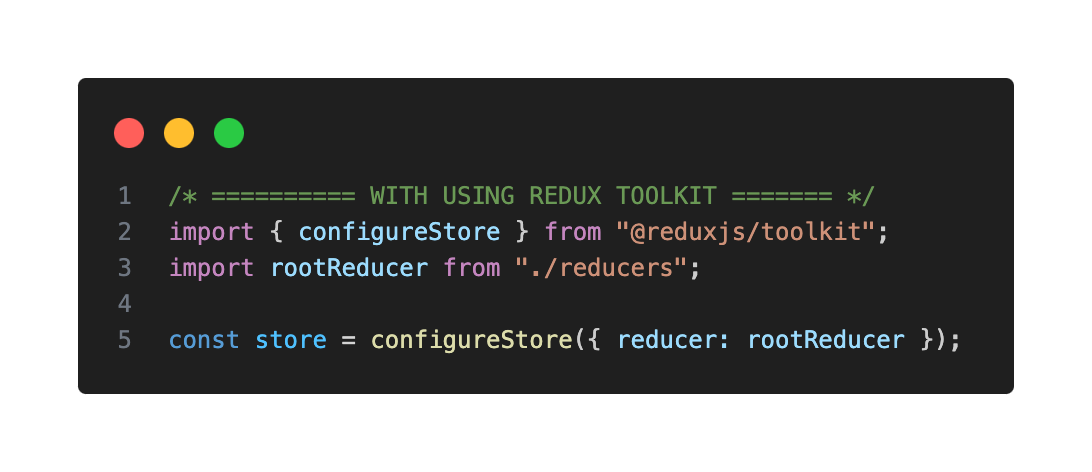
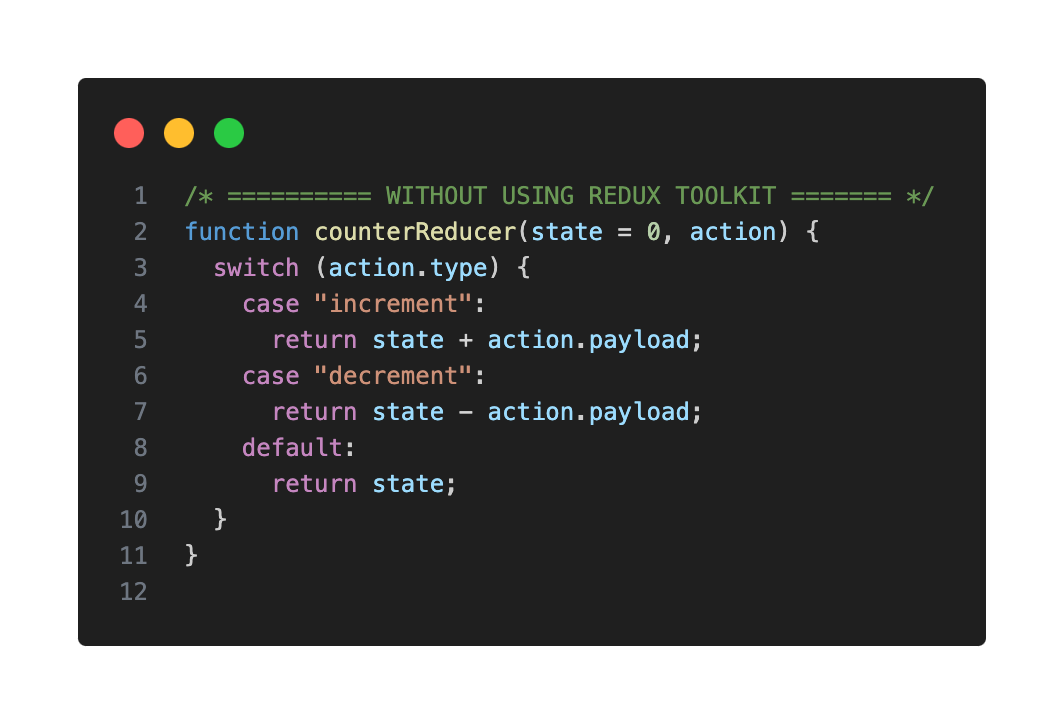
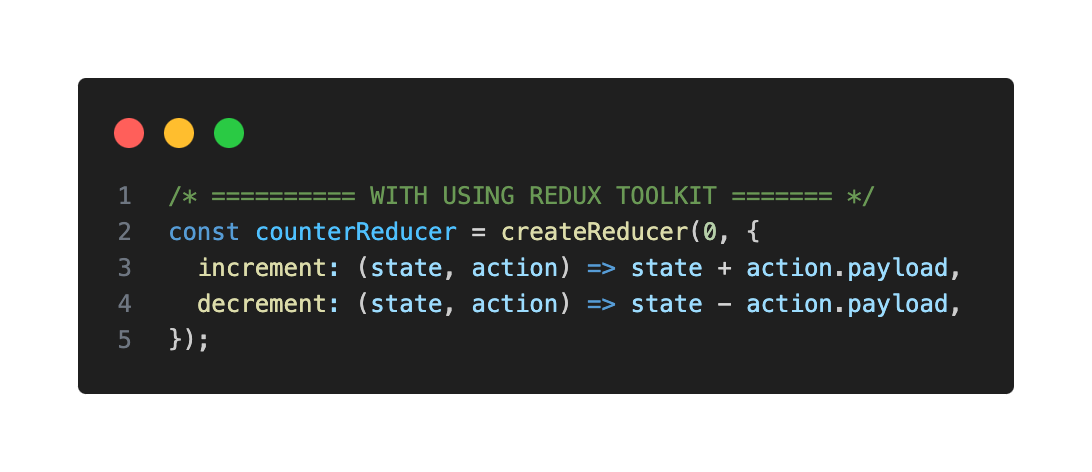
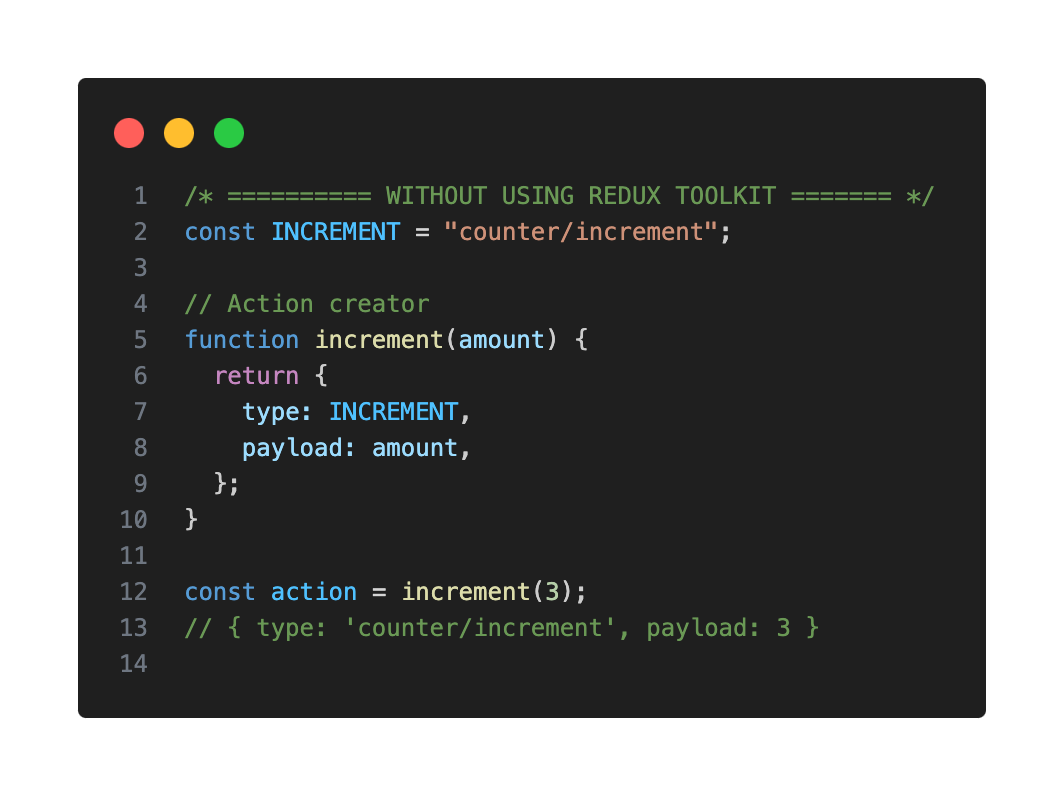
I hope that you are already familiar with Redux and its core concepts above. Let's take a look at these images below, where I compare code without using Redux Toolkit and with Redux Toolkit.
createStore:
createReducer:
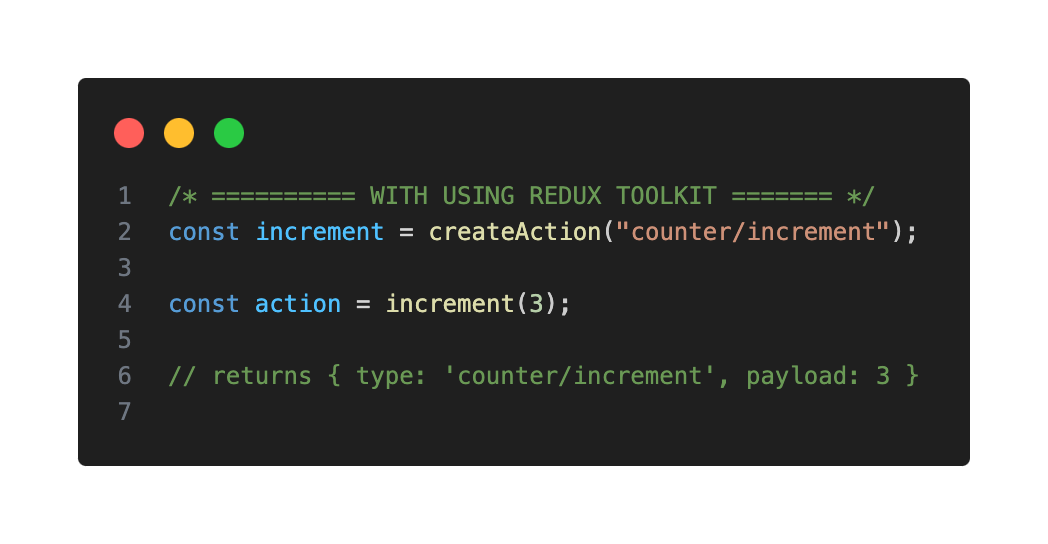
createAction:
You may notice that Redux can sometimes become rather verbose. This verbosity stems from the need to go through multiple steps in creating a comprehensive Redux store, resulting in the generation of numerous files containing repetitive code. Furthermore, Redux lacks a clear standard for structuring logic, and in some cases, we find ourselves having to install additional libraries like middleware, selectors, etc. to effectively manage state logic.
This is why Redux Toolkit was developed to address many of the issues mentioned above.
II. How does Redux Toolkit work?
Step 1: Setting up an application
1. Start by creating a new React project with Typescript using the following command in the terminal.
npx create-react-app blog --template typescript
cd blog
yarn add -D prettier eslint-plugin-prettier eslint-congig-prettier
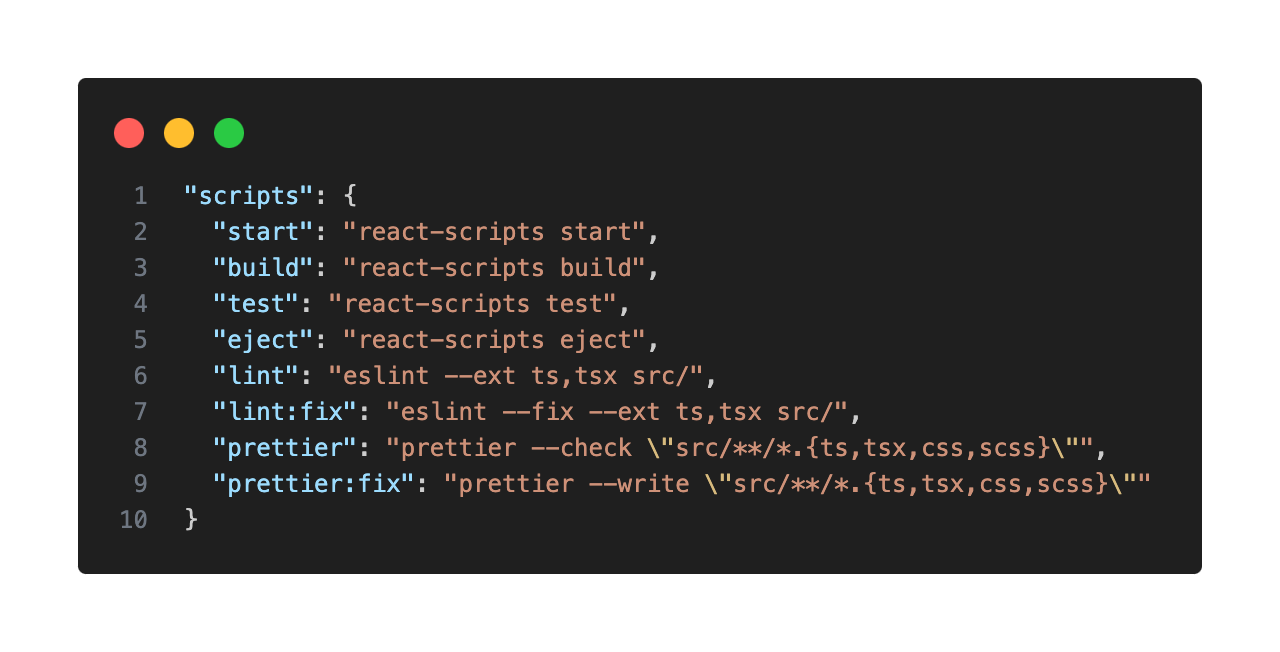
2. Open package.json file for configuration (line 6 - 10)
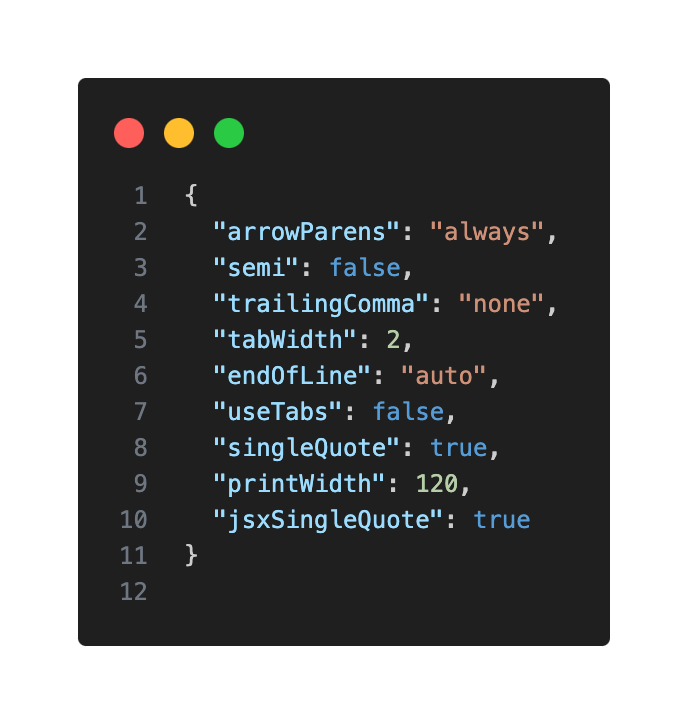
3. Create .prettierrc file in the blog directory
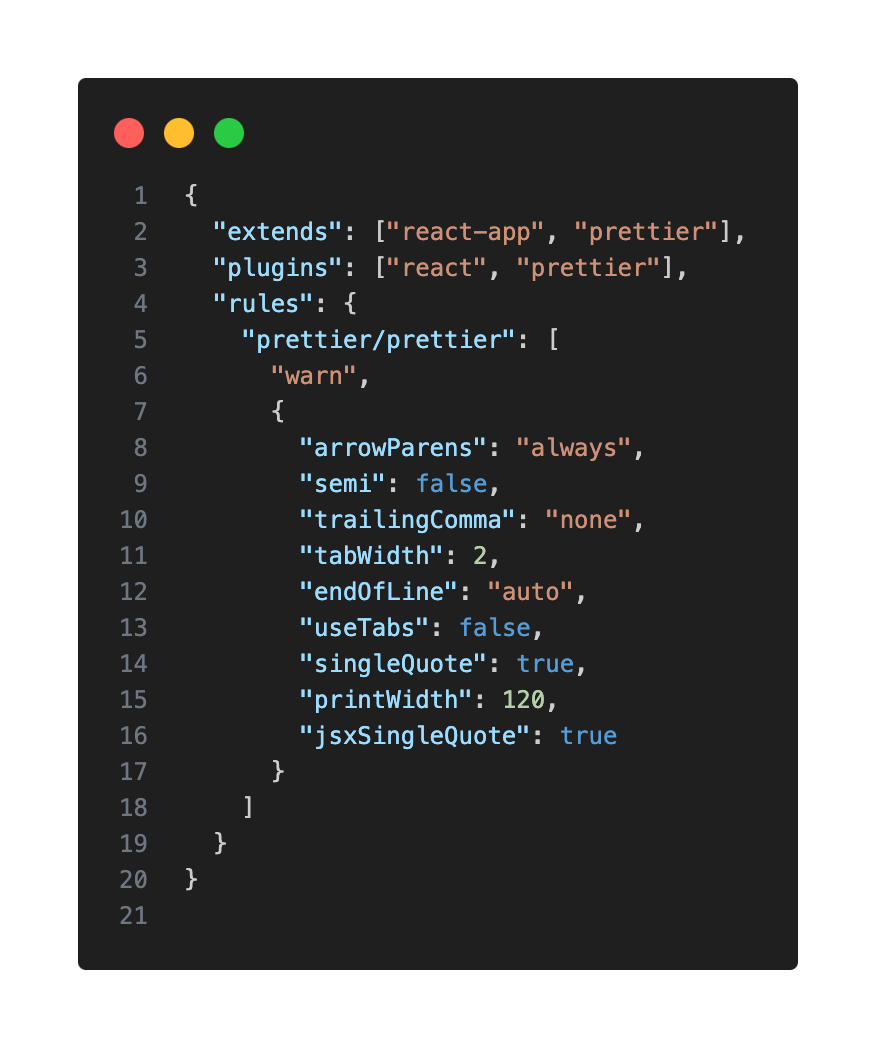
4. Create .eslintrc file in the blog directory
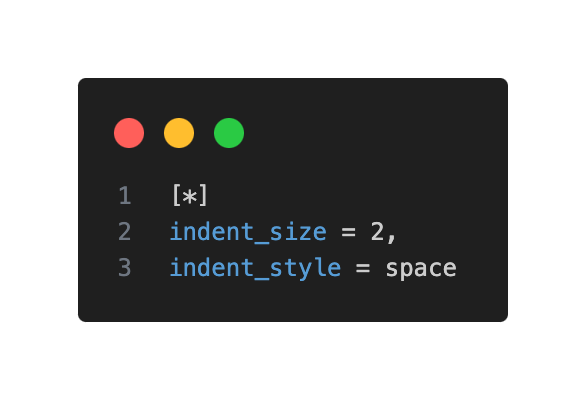
5. Create .editorconfig file in the blog directory
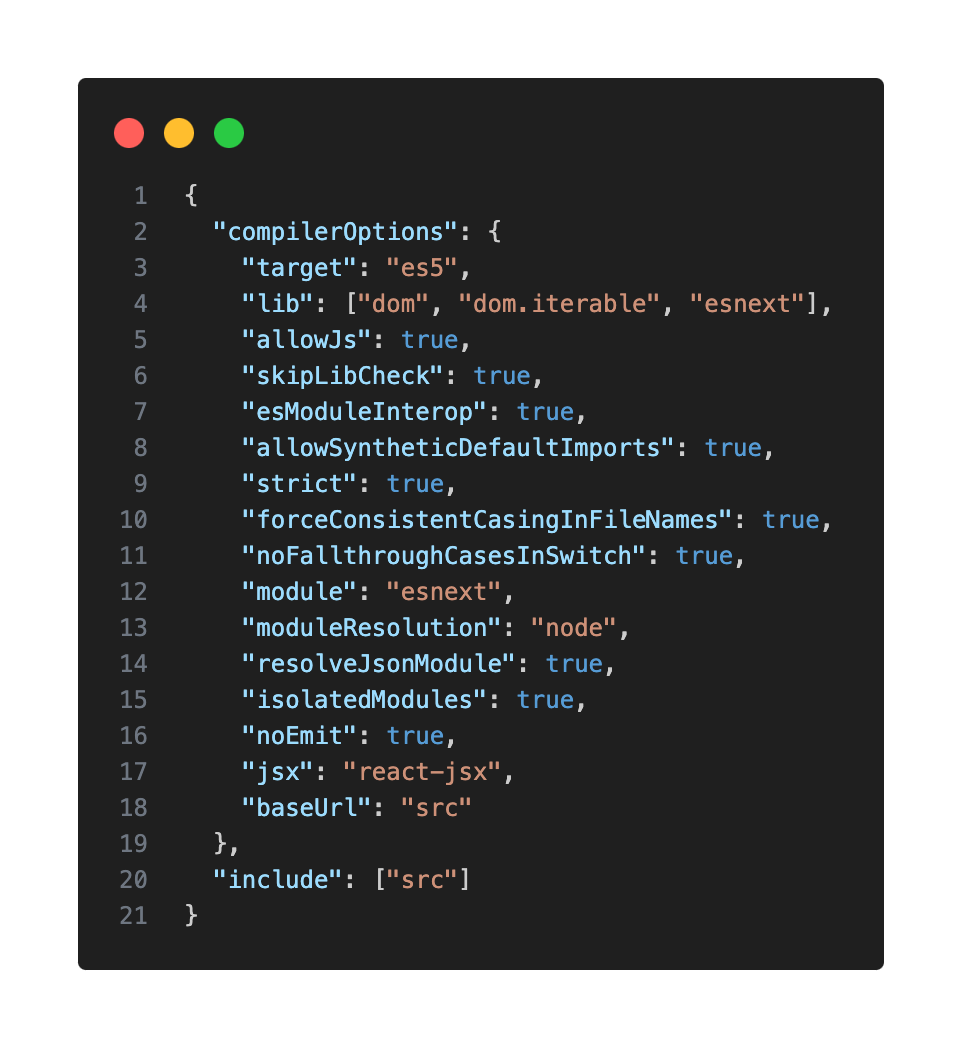
6. Open tsconfig.json (line 18)
7. Install Tailwinds CSS:
yarn add tailwindcss postcss autoprefixer
npx tailwindcss init -p
Open tailwind.config.js file

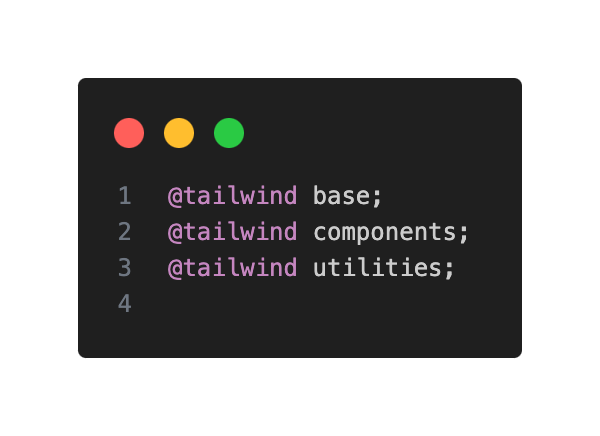
8. Open index.css in the blog/src/ directory
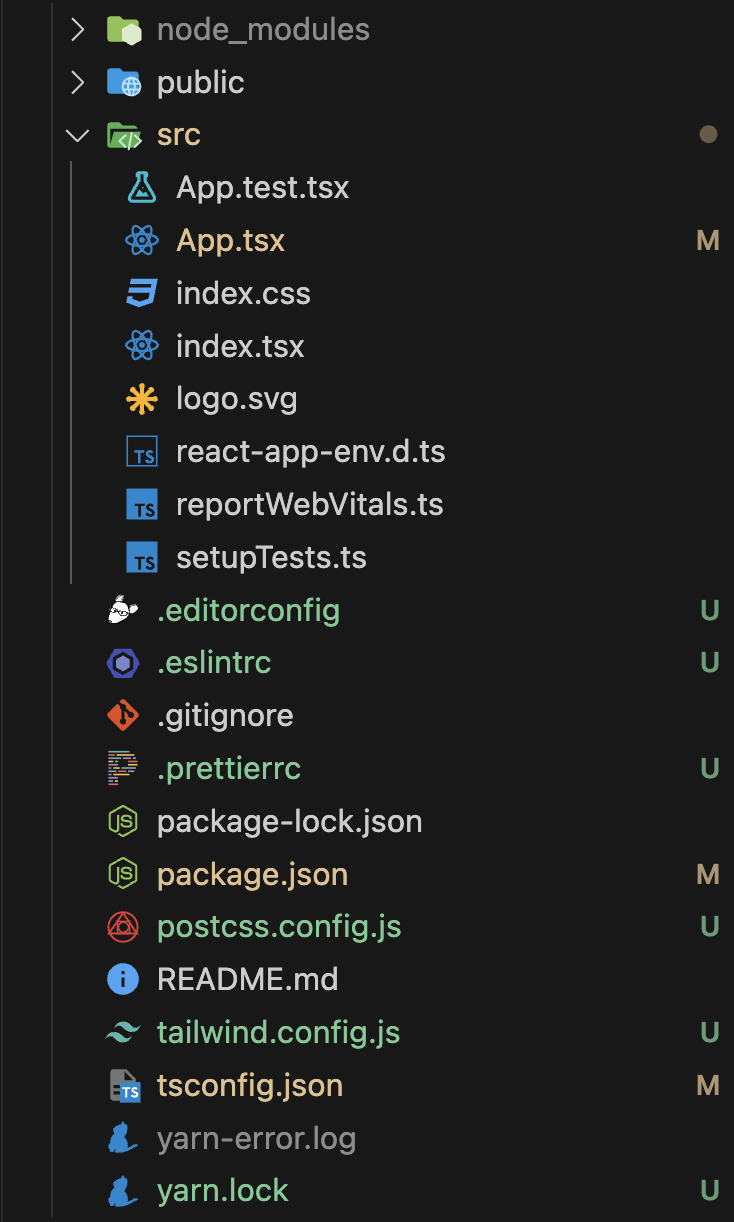
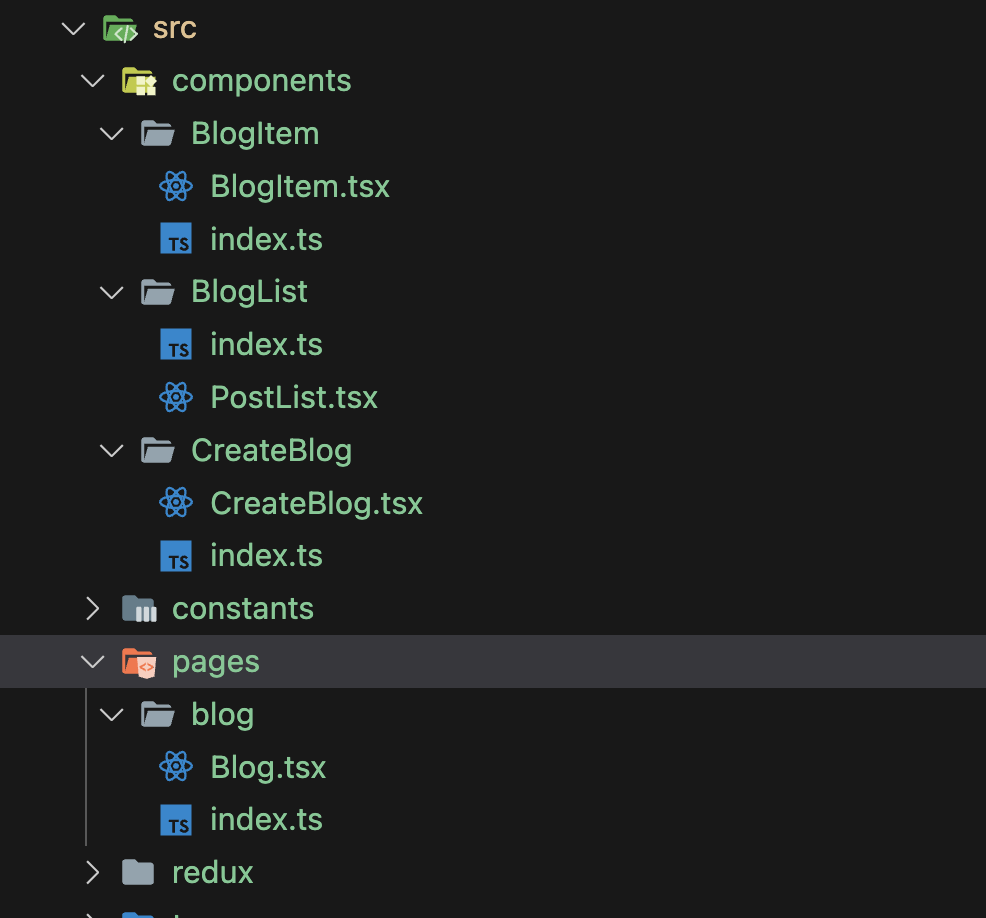
9. Remove any unnecessary folders or files. The source code structure should look like this.
10. Finally, run
yarn start
Step 2: How to install Redux Toolkit and React Redux
yarn add @reduxjs/toolkit react-redux
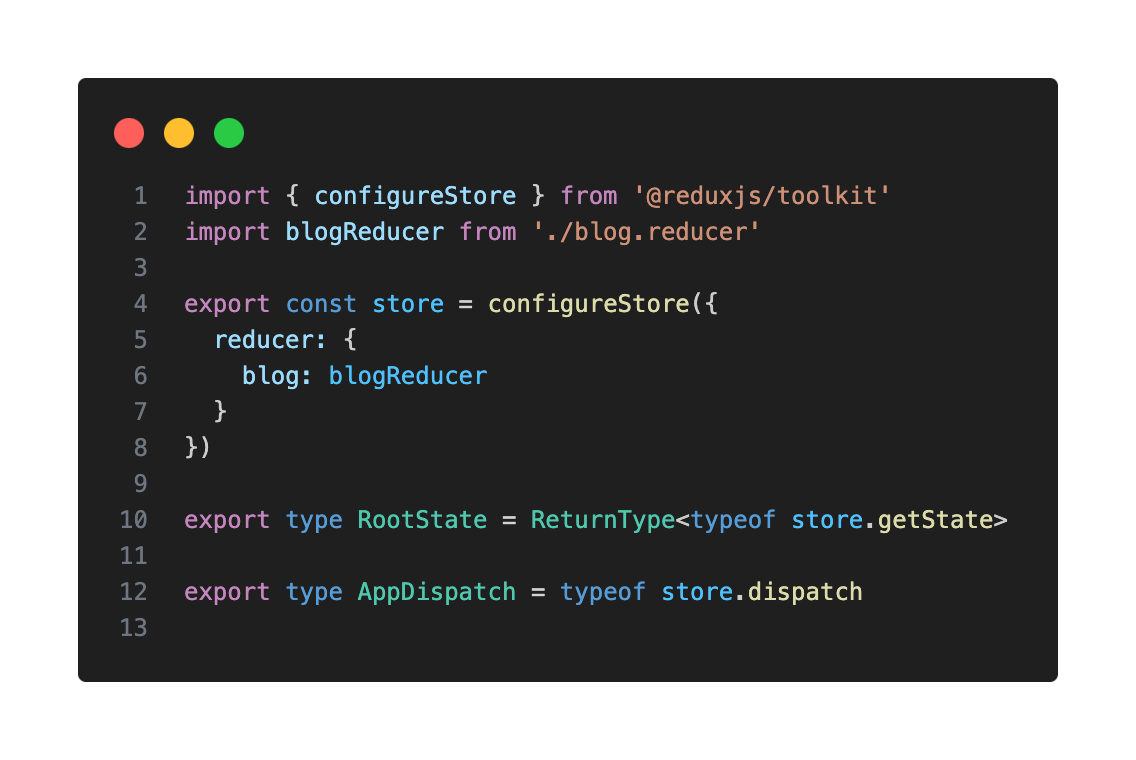
Step 3: How to create a Redux store
1. Create a new directory named redux to contain Redux related files. Inside redux directory, create a new file called store.ts
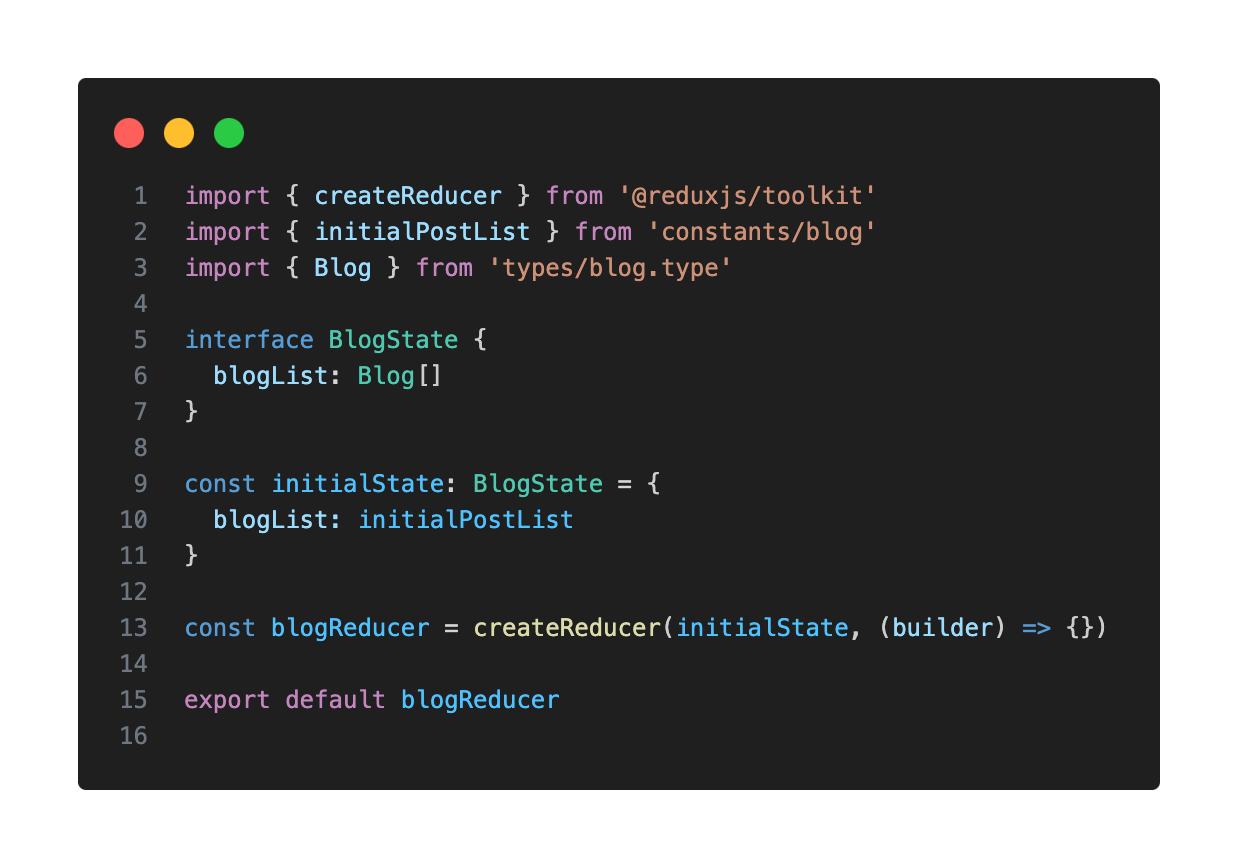
2. Create a new file blog.reducer.ts
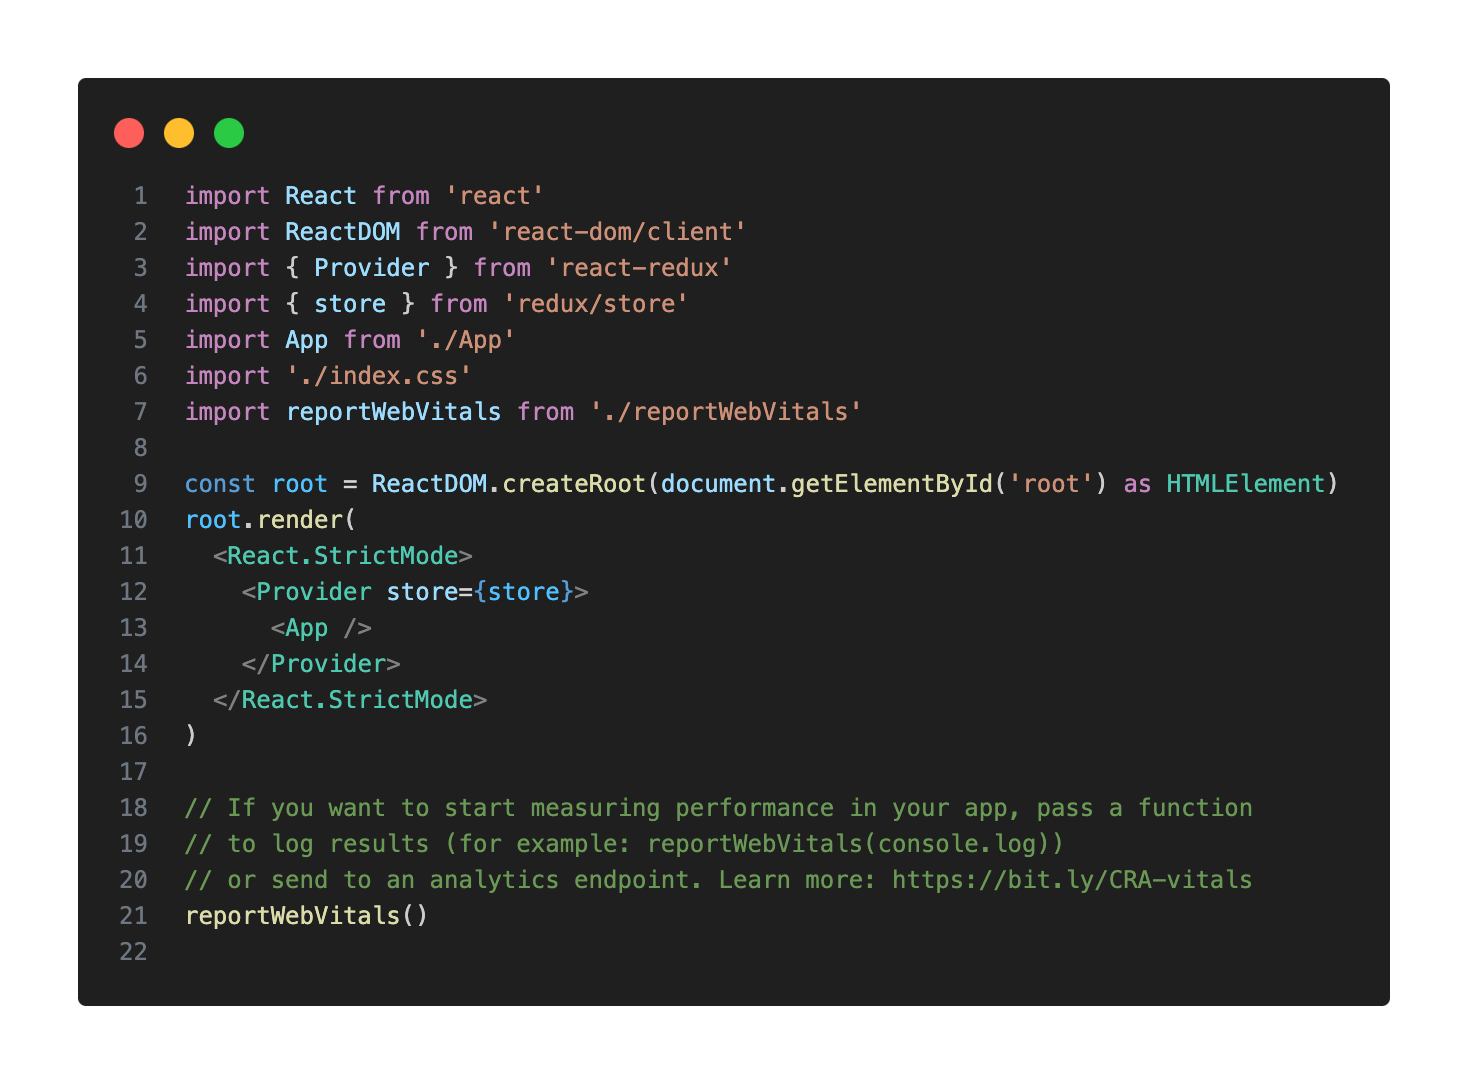
3. Open index.tsx add store into Provider
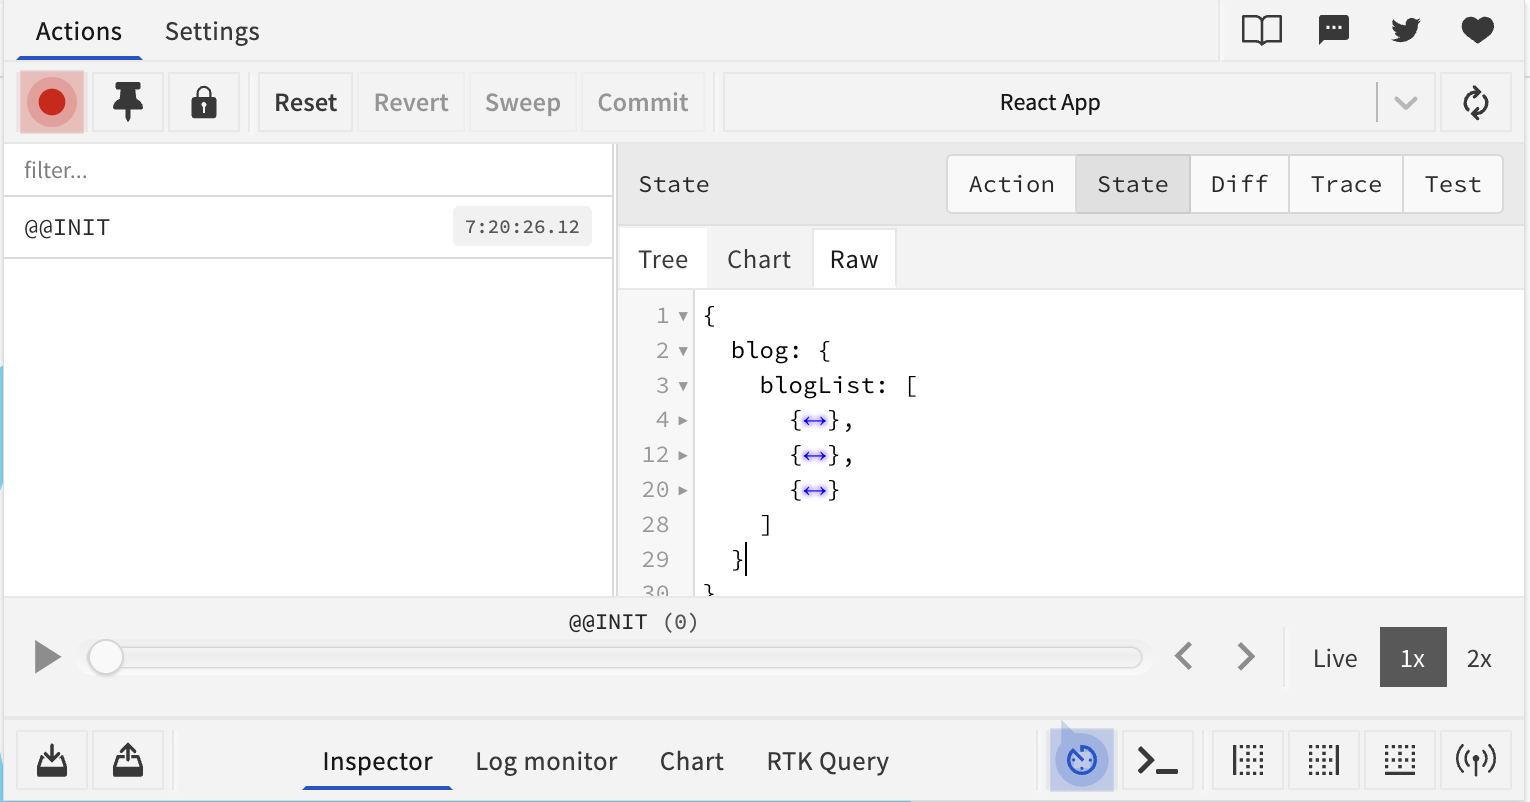
 Then open Redux DevTool to see data tree
4. Render blog data into UI
Create blog components into components and pages directory
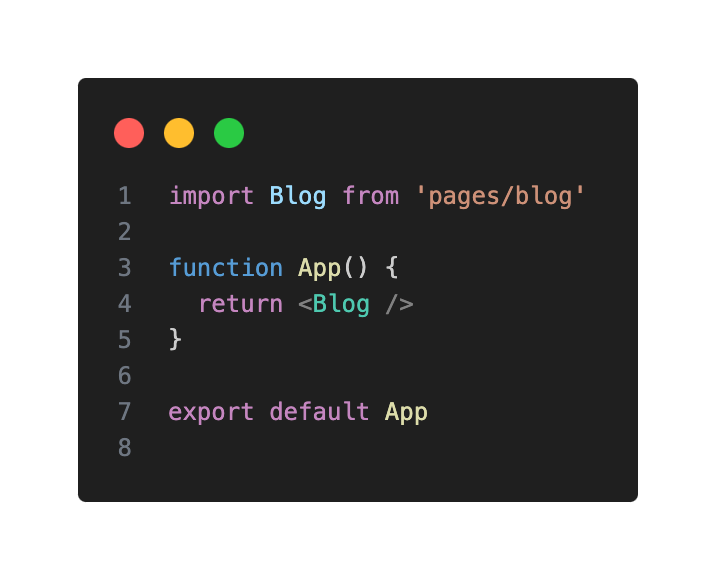
Then import Blog component into App.tsx
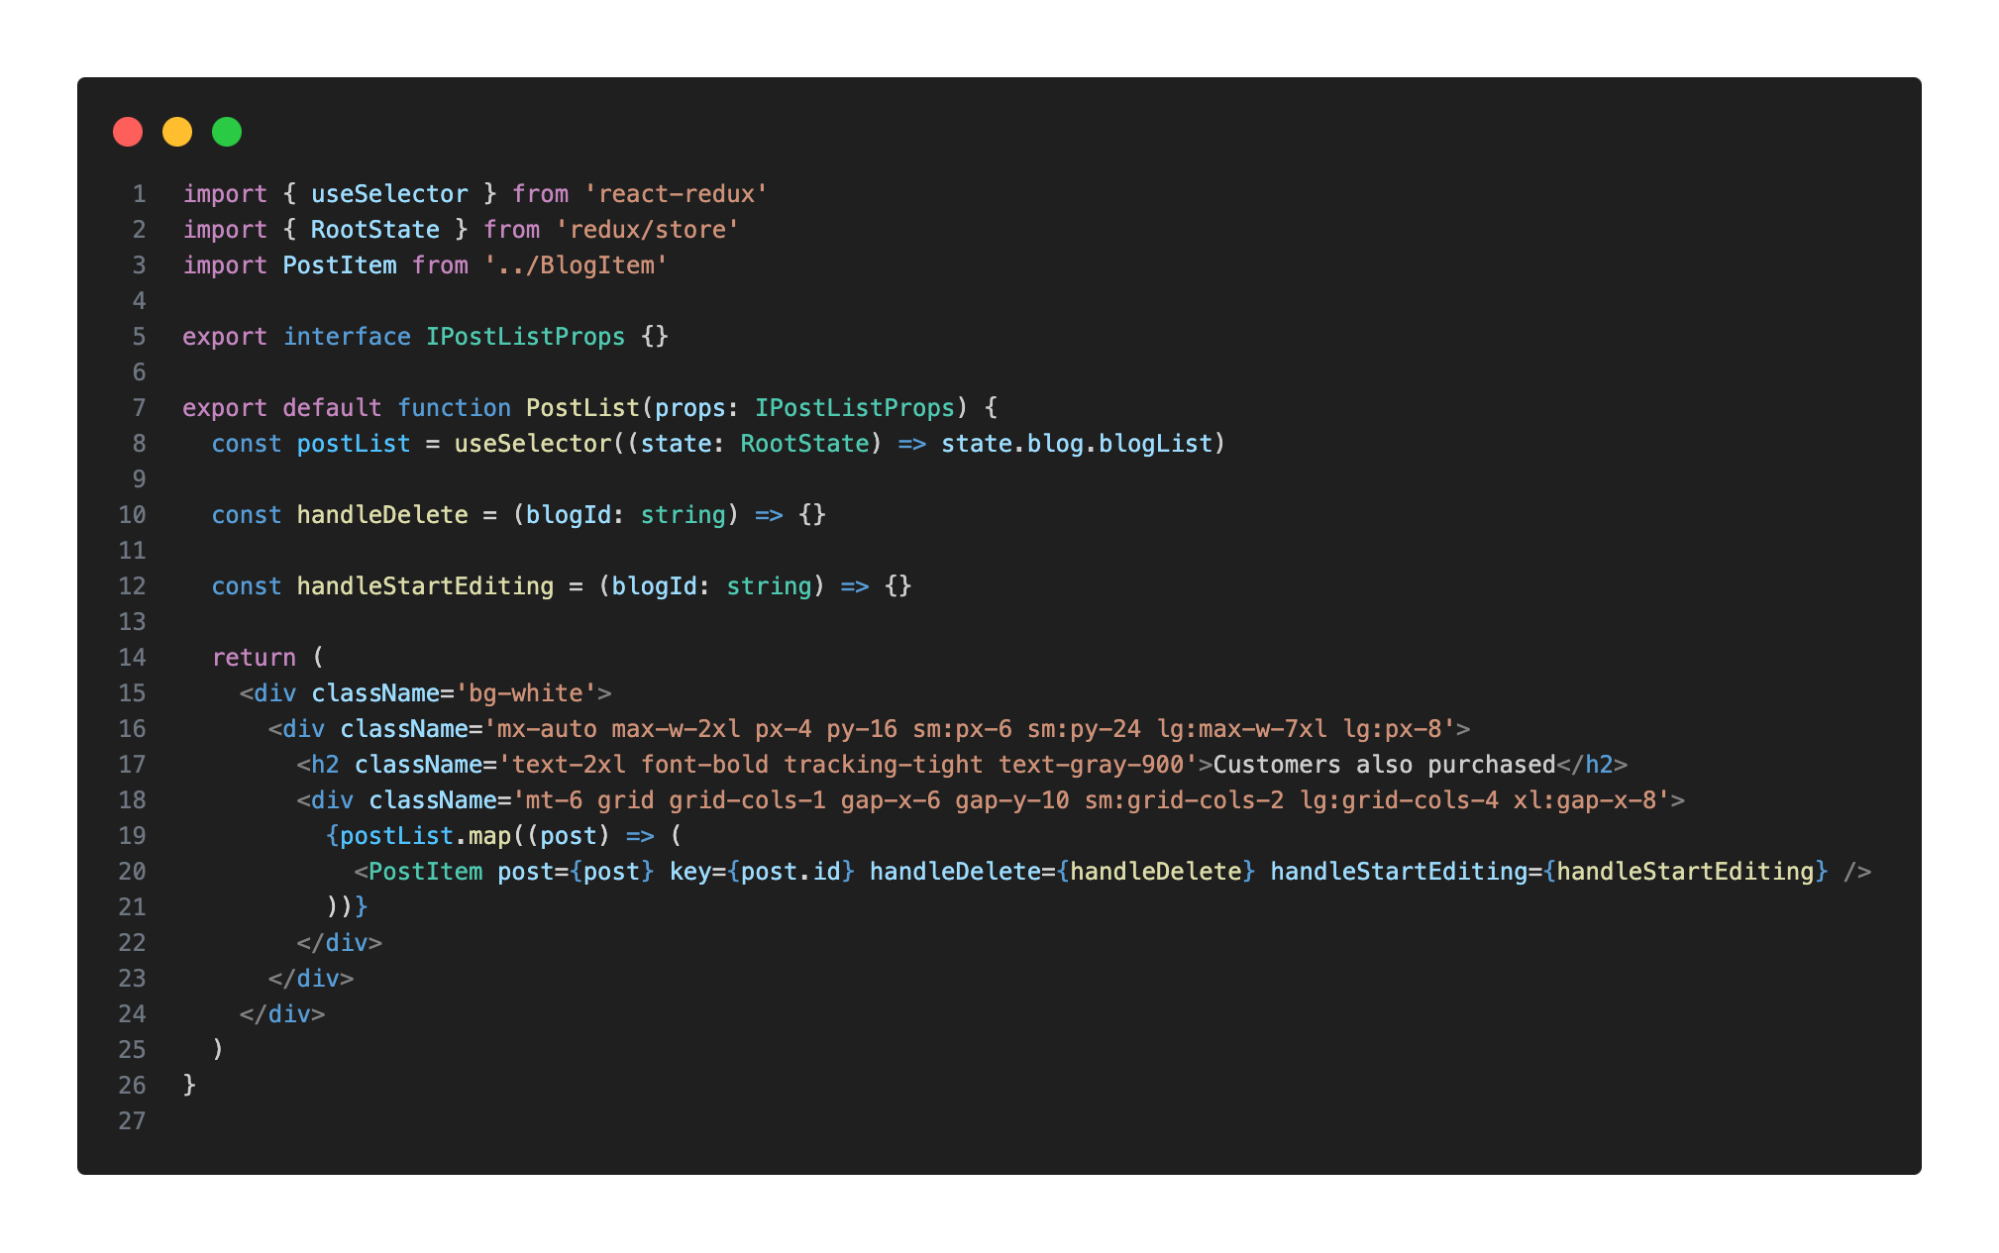
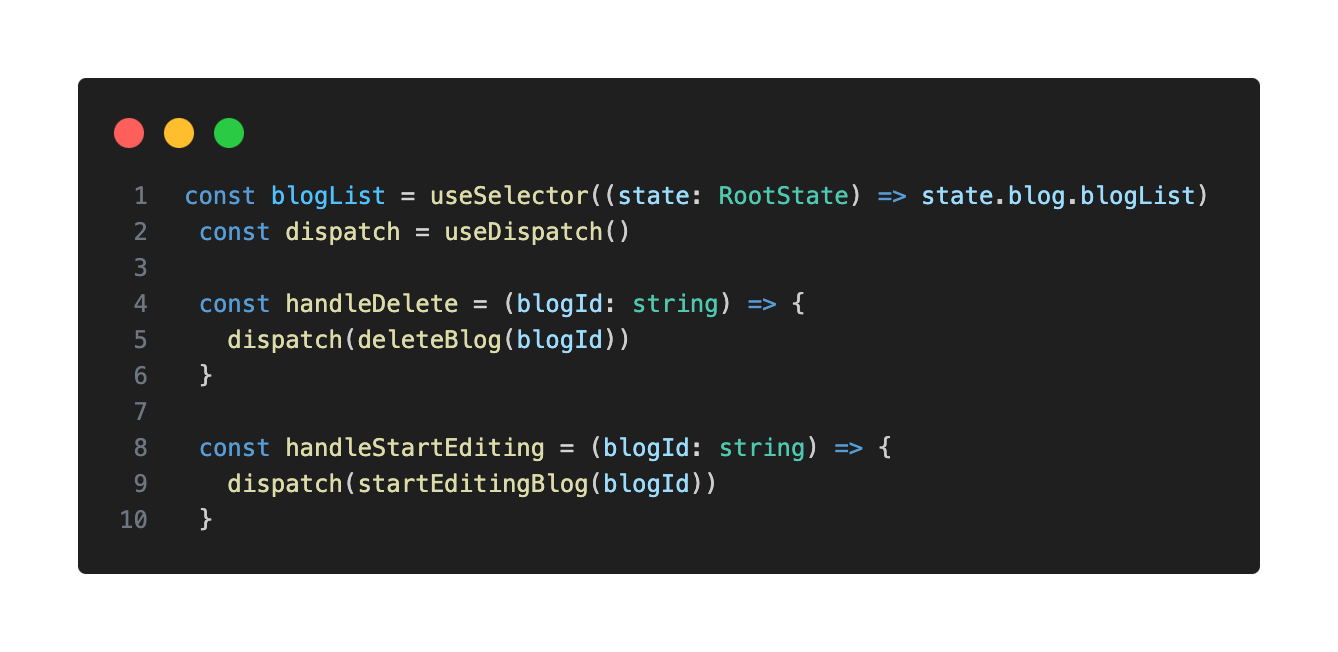
Use useSelector to get blog data from store
Step 4: How to use with createAction
createAction: It’s a helper function for define a Redux action type and creator
function createAction(type, prepareAction?)
1. Open blog.reducer.ts file and create action

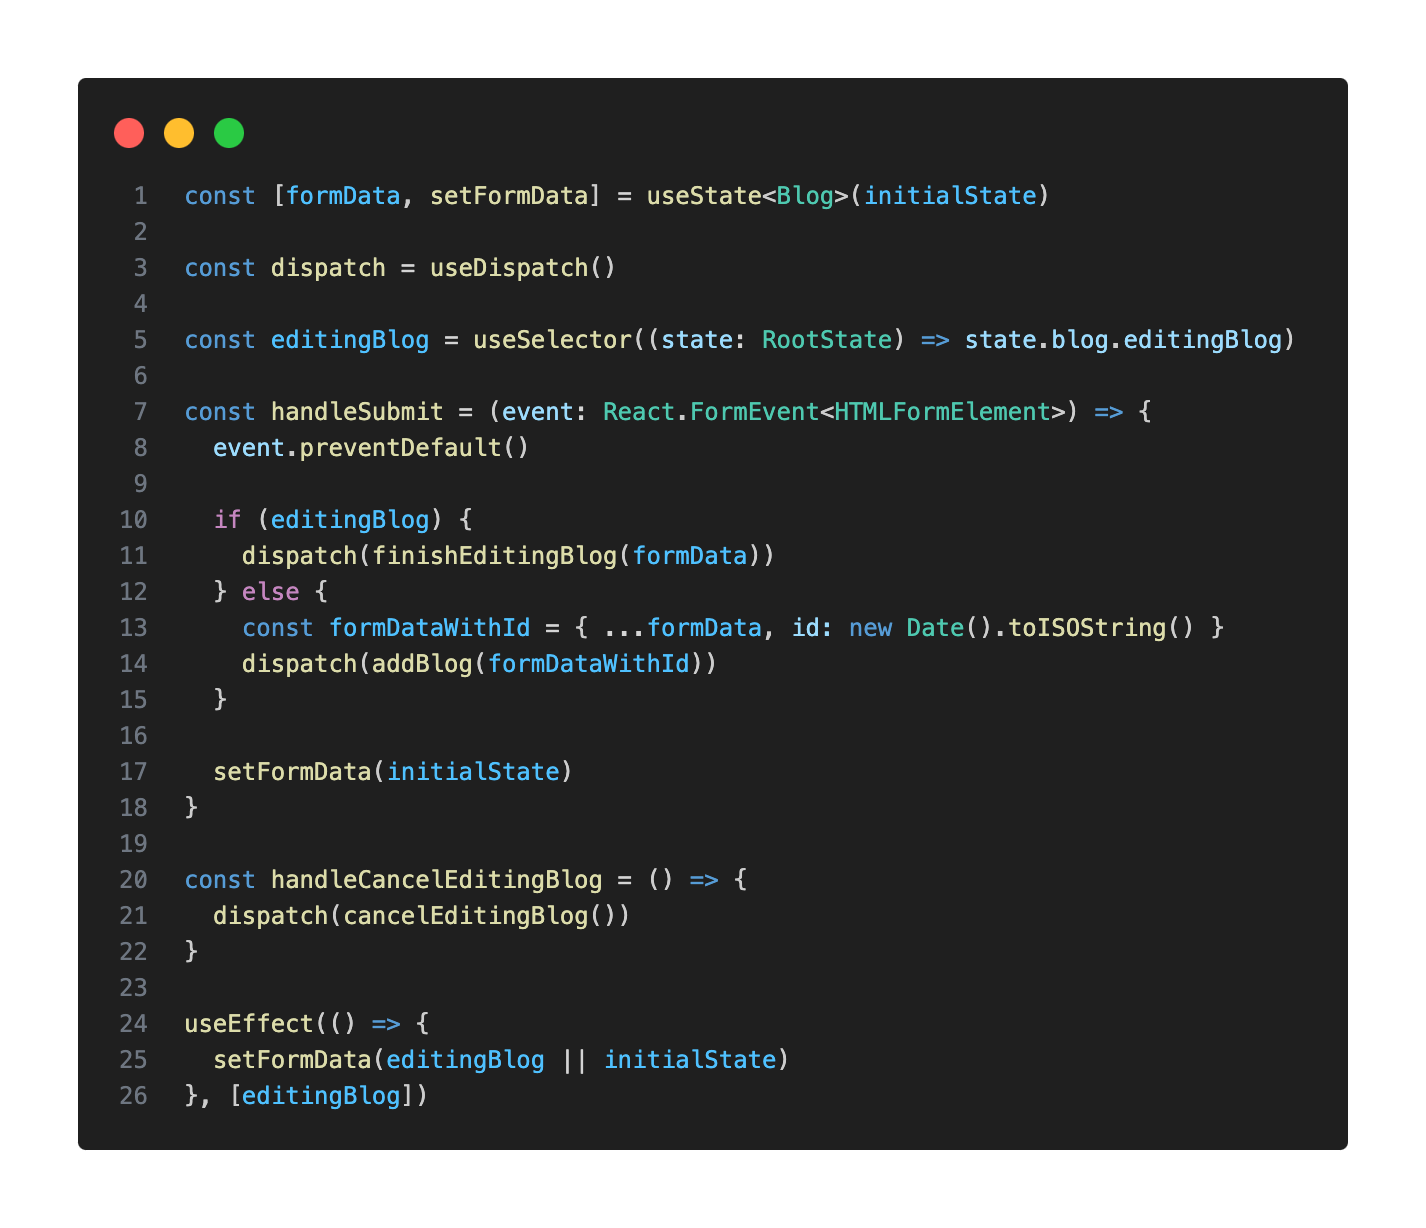
2. Open CreateBlog.tsx file to dispatch action
3. Open BlogList.tsx file dispatch action
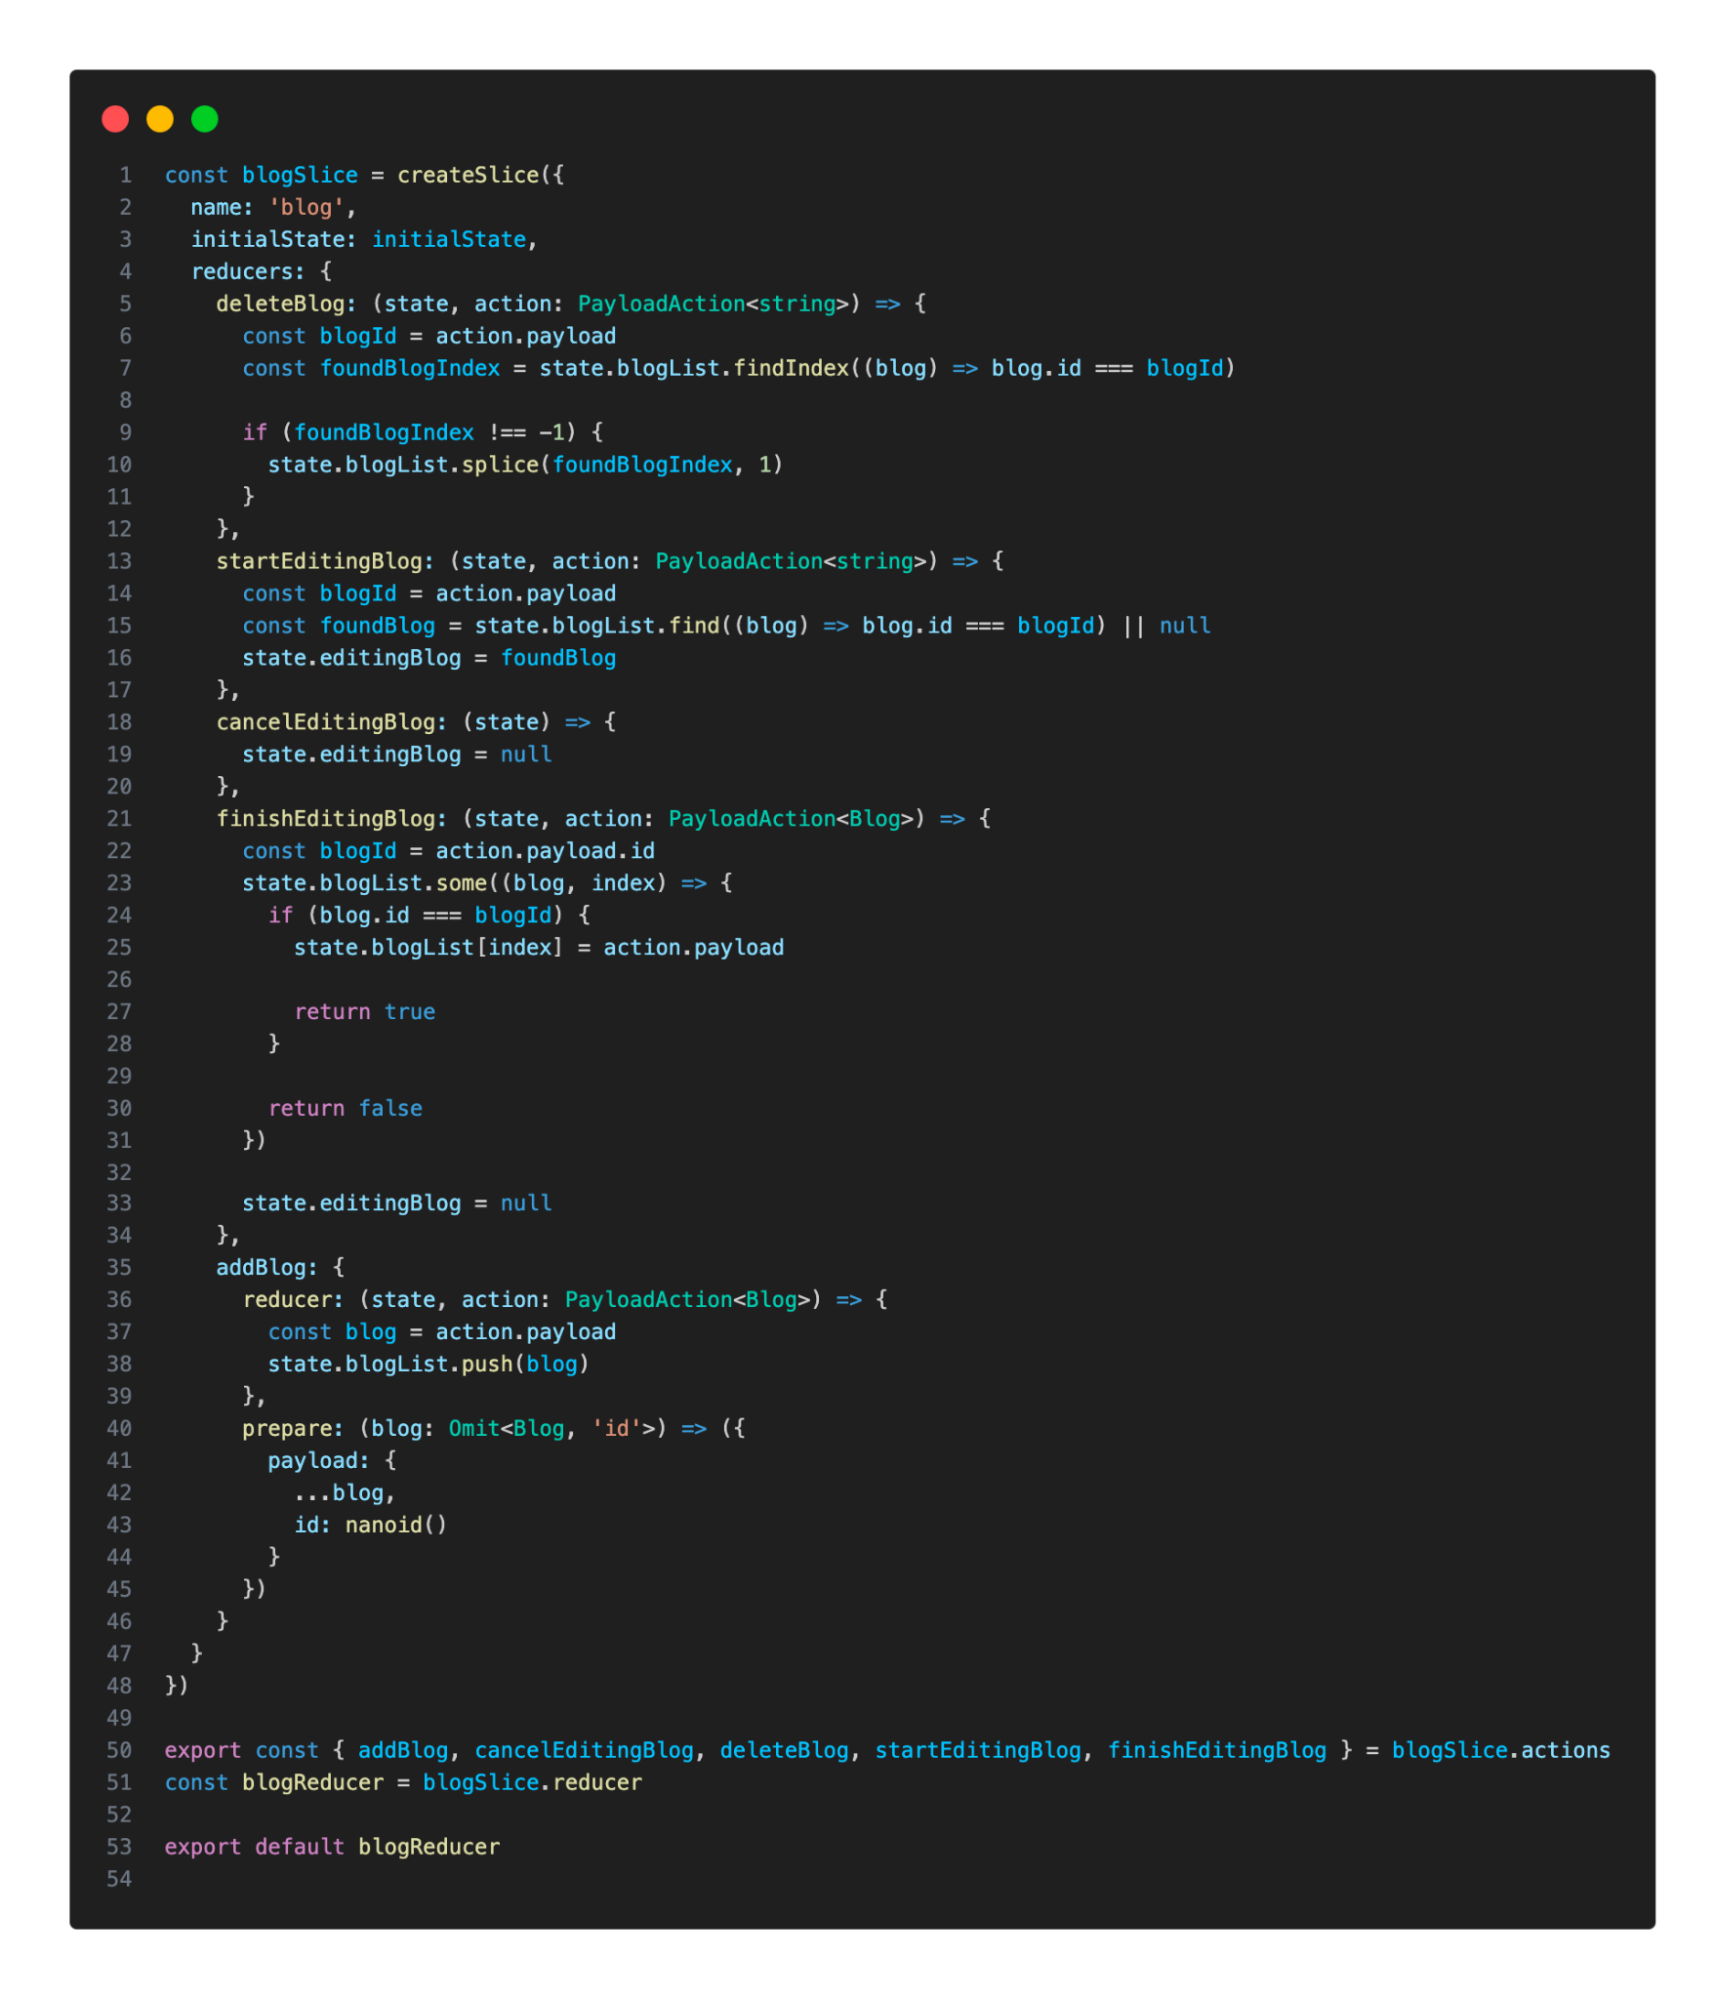
Step 5: How to use with createSlice
- createSlice: It’s a function that deals with everything needed for each slice, as you have readed createAction and createReducer above. It is accessible within the scope of the specific slice function.
- createSlice contains:
- name: A parameter that will be the prefix for all of action types
- initialState: The initial values for reducer
- reducers: This is an object in which the keys become action type strings, and the corresponding values are functions acting as reducers. These reducers will be executed when the associated action type is dispatched.
Rename blog.reducer.ts to blog.slice.ts, convert createAction and createReducer to createSlice
 This application is not integrated with an API. If the application requires APIs integration, I suggest that you should research more about creating createAsyncThunk and RTK Query. Remember that this is a basic example, and as your application grows, you can continue to add more slices, actions, and components to your Redux store.
Show source demo:
I will show you the small react application using Redux Toolkit to manage state.
III. Conclusion
Redux Toolkit is a powerful tool. It streamlines the process of setting Redux, reduces boilerplate code, and provides clear structure for managing actions, reducers and selectors. The integration of Immer for immutable state updates simplifies complex state modifications, making our code more readable and maintainable.
Now, should we use Redux Toolkit for our application? Based on my experience, I strongly recommend it. Because Redux Toolkit addresses many of the pain points when developers working with Redux. It helps developers make the stage management process smoother and more enjoyable. Incase that you’re starting a new project or refactoring an existing one, Redux Toolkit can save your time and effort, allowing you to focus on building features rather than wrestling with Redux setup.
So, go ahead, give it a try and watch your Redux become clearer, more manageable, and ultimately more enjoyable to work with.
Happy coding!
The end
Resources
Demo source code: https://github.com/saigontechnology/Blog-Resources/tree/main/React/yen.ka/basic-redux-toolkit
Follow our newsletter. Master every day with deep insights into software development from the experts at Saigon Technology!


